Identifying Your Ceiling Fan Model
Before attempting a ceiling fan led light replacement, identifying your fan model is crucial. This ensures you purchase the right LED lights.
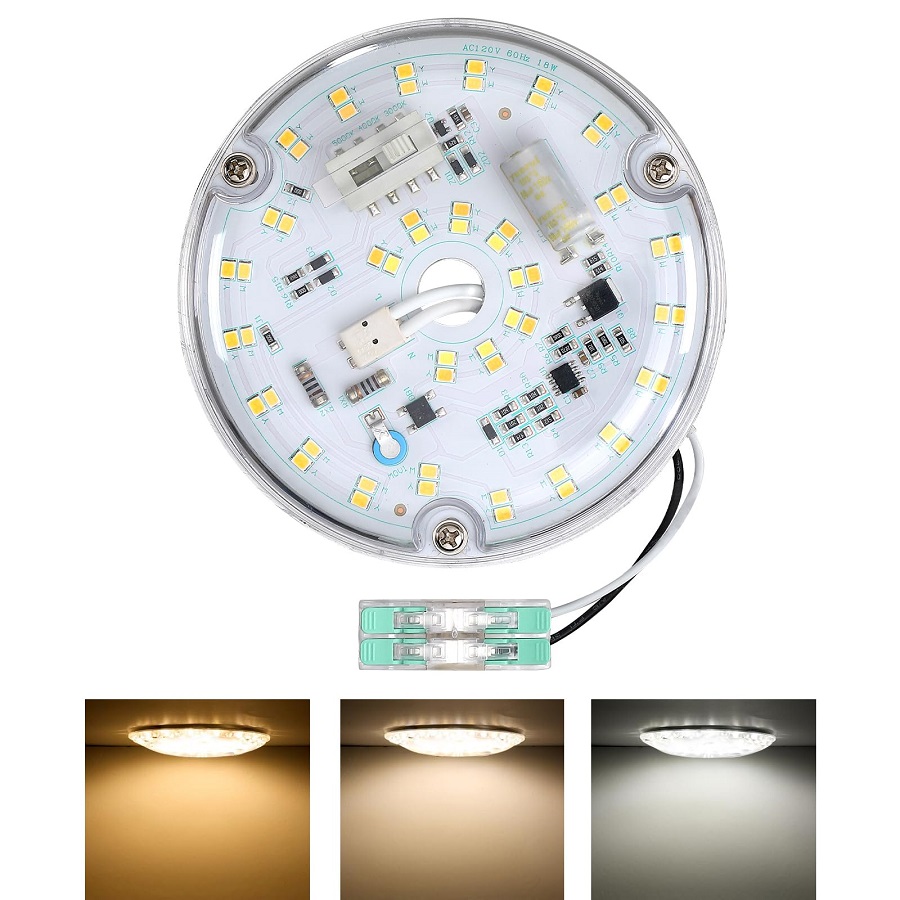
First, turn off your ceiling fan at the wall switch. Make sure the blades have stopped completely before proceeding. Look for a label or sticker on the fan housing. This is often on the top, where the fan meets the ceiling. The label should have the model number and manufacturer’s name.
If the label is missing or unreadable, check your manual. In case you have lost the manual, visit the manufacturer’s website. Most brands list their fan models with detailed specs online. You can also reach out to their customer support for assistance.
Once you have the model details, note them down. You may find it helpful when purchasing your LED lights. It can also assist in seeking help from lighting specialists or hardware store staff. With the correct model information, your ceiling fan led light replacement will go smoother.
Preparing for LED Light Replacement
Before starting your ceiling fan LED light replacement, proper preparation is key to a smooth process. Make sure the tools and new LED lights are ready before you begin. Here’s a list to help you prepare:
- Gather Your Tools: You’ll need a screwdriver, wire cutters, wire stripper, and a ladder. Safety goggles and insulated gloves are also smart to have on hand.
- Purchase the Correct LED Lights: Based on your ceiling fan model, buy the right LED light bulbs. Remember, the bulb base must match the fan’s specifications.
- Power Off: Safety first. Turn off the power to your ceiling fan at the circuit breaker to avoid electrical shocks. This is crucial even if you’ve turned the wall switch off.
- Clear the Area: Ensure you have enough space to work. Move furniture if necessary. This prevents accidents and gives you easy access to the ceiling fan.
- Set Up Your Ladder: Place your ladder so you safely reach the ceiling fan. It should be stable and at a comfortable height.
- Remove the Existing Bulbs: Carefully remove the current bulbs from the fan. If they’re hot, wait for them to cool down first.
- Dust Off the Fan: Clean the fan blades and fixtures. This will ensure your new LED lights shine brightly without dust interference.
Following these steps will make your ceiling fan LED light replacement project go without a hitch. Take your time and don’t rush through the preparations.
Types of LED Lights for Ceiling Fans
Choosing the right types of LED lights for your ceiling fan is vital. There are several options you can consider when selecting LED lights for a ceiling fan. Here’s a breakdown:
- Standard LED Bulbs: These are common and fit in most ceiling fans. They come in various shapes and wattages.
- Candelabra LED Bulbs: Smaller in base, they are ideal for ceiling fans with compact light fixtures.
- Globe LED Bulbs: They provide a wider spread of light, fitting for ceiling fans in large rooms.
- Reflectors: These are good for directional lighting in a room. They focus light in specific areas.
- Smart LED Bulbs: You can control these bulbs with a smartphone or voice assistant. Some even change colors.
When buying LED lights, match the bulb base type to your fan’s specs. Check for ‘dimmable’ lights if you want to adjust brightness. Look for the Energy Star label for energy-saving options. Remember to confirm the size as well, to ensure they’ll fit your fan’s light fixture. The right LED lights can increase the functionality and ambiance of your space. By keeping the process of ceiling fan led light replacement in mind, you’ll achieve better lighting with lower energy costs.
 Step-by-Step LED Light Swapping Process
After preparing the area and selecting the right LED lights for your ceiling fan, it’s time to begin the installation process. Here’s a step-by-step guide to help you through the ceiling fan led light replacement:
- Safety Check: Double-check that the power is off at the circuit breaker.
- Access the Light Fixture: Use your ladder to reach the ceiling fan. Remove any light shades or covers safely.
- Uninstall Old Bulbs: Gently twist the old bulbs counter-clockwise to remove them from the fixture.
- Install New LED Bulbs: Align the base of the new LED bulbs with the socket and turn clockwise until snug. Do not over-tighten.
- Reassemble the Fixture: Put back any shades or covers you removed. Ensure they’re secure.
- Restore Power: Once all bulbs are in place, turn the power back on at the circuit breaker.
- Test the Lights: Flip the wall switch to test the new LED lights. They should illuminate immediately.
- Adjust as Needed: If your ceiling fan has a dimming feature, test and adjust the light intensity to your preference.
By following these steps, you can complete your ceiling fan led light replacement with ease and ensure a successful update to your lighting. Keep your workspace tidy and tools organized for a hassle-free process. Remember to handle the new LED lights carefully to prevent damage. If at any stage you are unsure or uncomfortable with the process, do not hesitate to consult a professional electrician for assistance.
Safety Precautions When Replacing Ceiling Fan Lights
Safety is essential when handling electrical fixtures. Here are key safety precautions for ceiling fan led light replacement:
- Cut the Power: Always turn off the power at the circuit breaker. This prevents electric shock.
- Test for Electricity: Use a voltage tester to check the wires. Make sure there’s no current.
- Use Proper Tools: Choose screwdrivers with insulated handles. Wear safety goggles and gloves for protection.
- Steady Ladder: Ensure your ladder is stable. It should not wobble as you climb.
- Handle Bulbs Carefully: LED bulbs are fragile. Grip them softly to prevent breaking.
- Avoid Metal Contact: Don’t let the bulb touch metal parts during installation. This could short the fixture.
- Follow Instructions: Read your fan’s manual for specific steps. Stick to the manufacturer’s guidelines.
- No Water Near: Keep liquids away from your work area. Water increases the risk of electrical shock.
- Don’t Rush: Take your time with each step of the replacement. Rushing might cause accidents.
- Seek Help if Unsure: If you’re not confident, get a professional electrician. It’s safer than risking mistakes.
By following these safety steps, you can replace your ceiling fan lights without accidents. Prioritize safety above all during your ceiling fan led light replacement project.
Troubleshooting Common Issues After Replacement
After completing your ceiling fan led light replacement, you might encounter some common issues. It’s important to know how to handle these effectively. Here are troubleshooting tips for the most common problems:
- Lights Not Turning On: First, check the circuit breaker to ensure power is on. Next, make certain the bulbs are correctly installed. If they still don’t work, try a different bulb to rule out a faulty LED.
- Flickering Lights: Flickering may happen with dimmable LEDs if your dimmer is not LED-compatible. Replace the dimmer switch with one suited for LEDs. Also, check for loose connections in the light fixture.
- Uneven Brightness: Sometimes, new LEDs may not match the brightness of existing bulbs. Ensure all replaced bulbs are the same type and wattage.
- Buzzing Sounds: This can be caused by incompatible dimmers or poor-quality bulbs. Use high-quality, compatible LED bulbs and switches to solve this issue.
- Remote Control Issues: If your ceiling fan is remote-controlled, new bulbs might affect functionality. Ensure the LED bulbs are compatible with remote-controlled fixtures.
- Color Temperature Differences: Make sure all new LEDs have the same color temperature for consistent lighting. Different temperatures result in varied light colors.
If these tips don’t resolve the issues, consult your fan’s manual or contact customer support. For electrical problems, reaching out to a professional is the best course of action. Safety is paramount, so address concerns promptly to avoid potential hazards.
 Enhancing Energy Efficiency with LED Lights
After successfully completing the ceiling fan LED light replacement, it’s worth noting the benefits of LED lights in terms of energy efficiency. LED lights are known to consume significantly less energy compared to traditional incandescent bulbs. Here’s how they enhance energy efficiency:
- Lower Power Consumption: LEDs use less power per unit of light emitted. This reduces energy bills.
- Longer Lifespan: They last longer, meaning fewer replacements and less waste.
- Less Heat Emission: LEDs emit less heat, leading to lower cooling costs in the summer.
- Instant Illumination: They light up immediately and require no warm-up time.
- Dimmable Options: With dimmable LEDs, you can adjust the brightness. This way, you only use as much light, and thus energy, as you need.
- Reliable in a Range of Temperatures: LEDs perform well in cold and hot conditions without an increase in power usage.
Using LED lights is not only cost-effective but also environmentally friendly. By opting for ceiling fan LED light replacement, you’re making a smart choice that benefits both your wallet and the planet. Ensure that all new lights you’ve installed are working fine and take pleasure in the improved ambiance and reduced energy consumption of your space.
Final Touches and Testing the New LED Light
Once you’ve completed the ceiling fan led light replacement, it’s time for the final touches. Here’s what you need to do:
- Inspect the Installation: Make sure all the bulbs are secure. Check if the light covers are in place.
- Clean Up: Collect your tools and clean any debris. A tidy space is safe to work in.
- Check the Connections: Ensure the electrical connections are tight. Loose wires can cause problems.
- Restore Power: Turn the power back on at your circuit breaker. This is crucial before testing.
- Test the Lights: Flip the switch to see if the LED lights work. They should light up without delay.
- Dimmer Function: If you have a dimmer, try adjusting the brightness. Make sure it works with your new LEDs.
- Adjustment: If the lights flicker or don’t turn on, double-check your work. Look at the fixture and bulbs again.
- Additional Checks: Test the fan and lights together. Make sure everything operates smoothly.
After these steps, your ceiling fan led light replacement should be complete. Enjoy your fan’s new, efficient lighting. If issues arise, revisit the troubleshooting section. For persistent problems, contact an electrician.
